> ## Documentation Index
> Fetch the complete documentation index at: https://docs.getcara.ai/llms.txt
> Use this file to discover all available pages before exploring further.
# Create, Save, and Use Templates
Turn any document Cara generates into a reusable, branded template
## How It Works
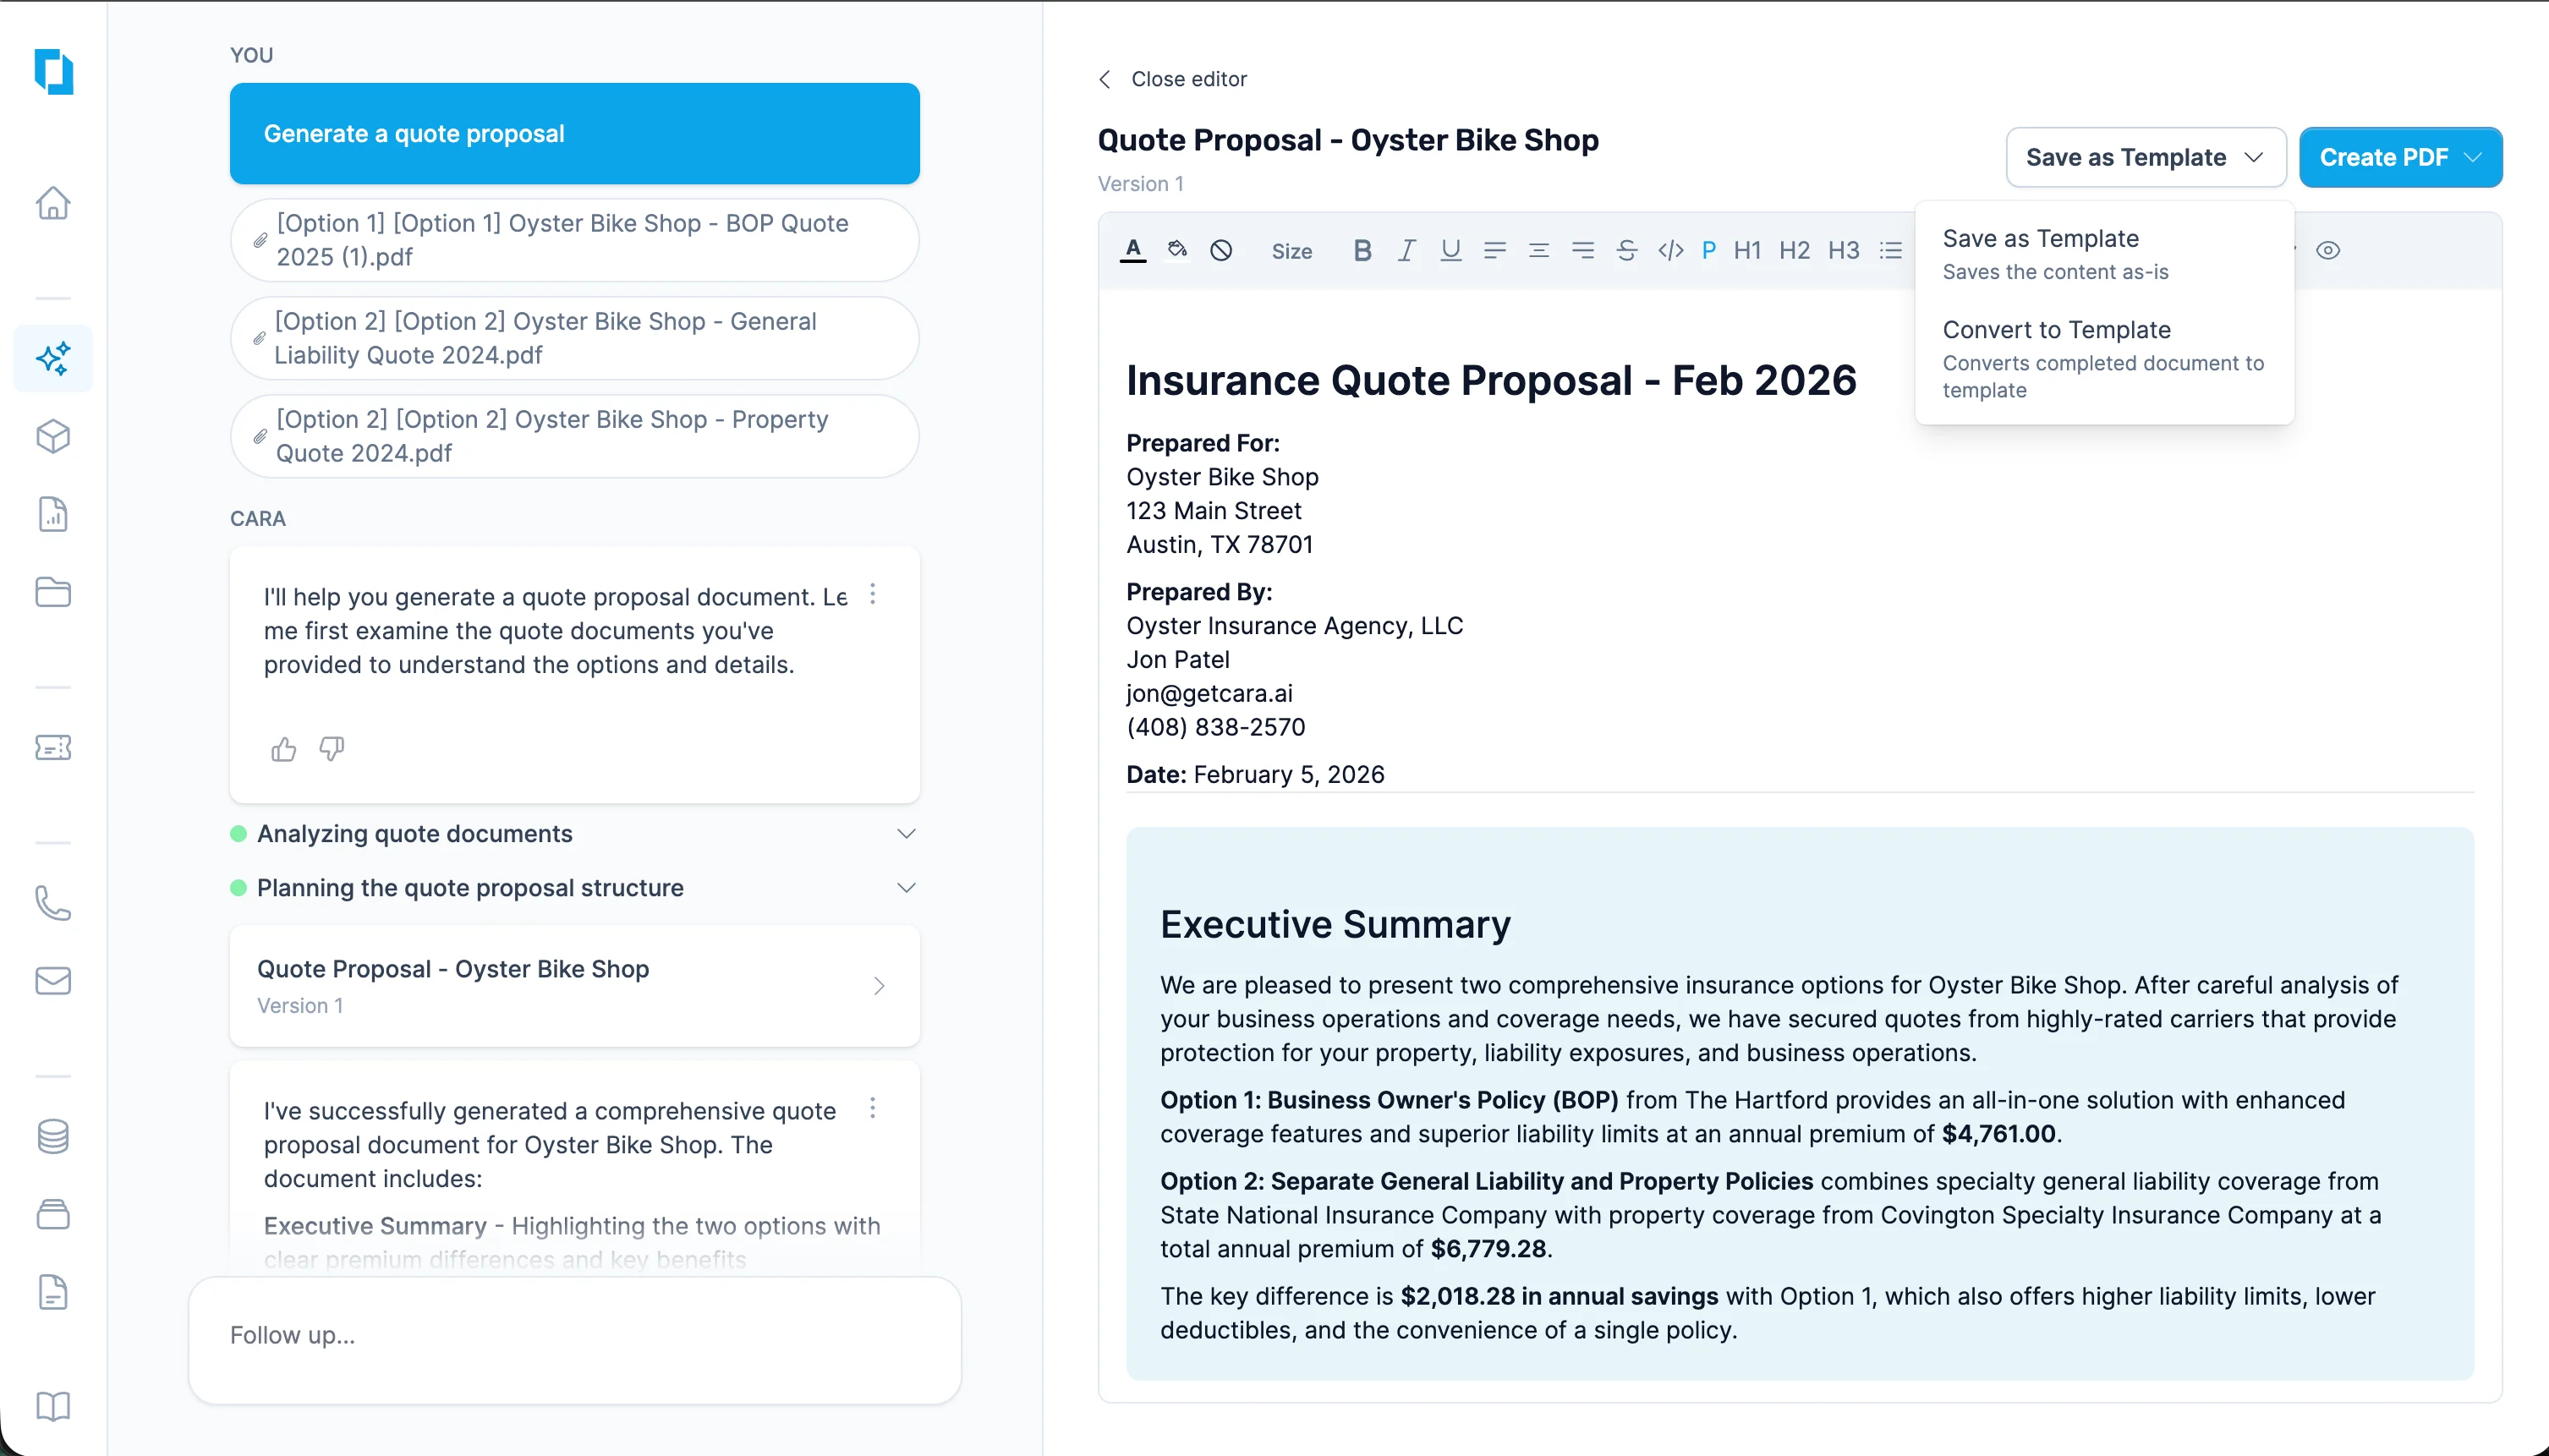 Prompt Cara to create any document.
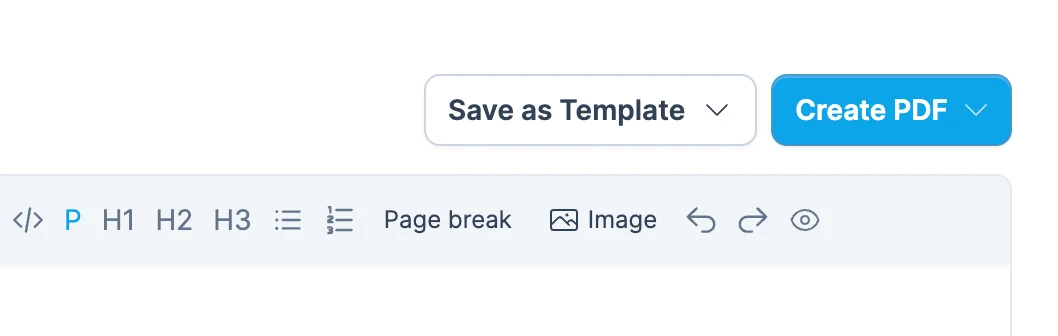
Once you're happy with the look and formatting, click **Save as Template** in the file editor and select **Convert to Template**
Cara will analyze the document and replace variable content (names, dates, limits, premiums, etc.) with placeholders in `[[DESCRIPTOR]]` format, while preserving all formatting, colors, tables, and layout.
Review the generated template, make any adjustments. Click "**Save as Template**" again, and select "**Save as Template**". Your saved templates will appear in the [**Styles**](/copilot/documentgeneration/styles) tab.
## Editing Templates
After a template is created, you can customize it in three ways:
### Before Saving
**AI Chat-Based Editing**
Ask Cara to make changes in plain language. For example:
* *"Add a row for Cyber Liability to the premium summary table"*
* *"Change the header color to match our brand blue"*
* *"Add a new placeholder for the account manager's phone number"*
Cara will update the template while preserving the existing structure and formatting.
**HTML Editor**
Click directly on any text in the file editor preview to edit it. This is useful for:
* Adjusting wording
* Table structures and layouts
* Adding page breaks
* Fonts and spacing
* Updating static text (e.g. company name, disclaimers)
* Renaming placeholders
* Adding new placeholders — type them using the `[[DESCRIPTOR]]` format (e.g. `[[COMPANY_NAME]]`, `[[DATE]]`)
### After Saving
Once saved, your template is available in the **Styles** tab where you can
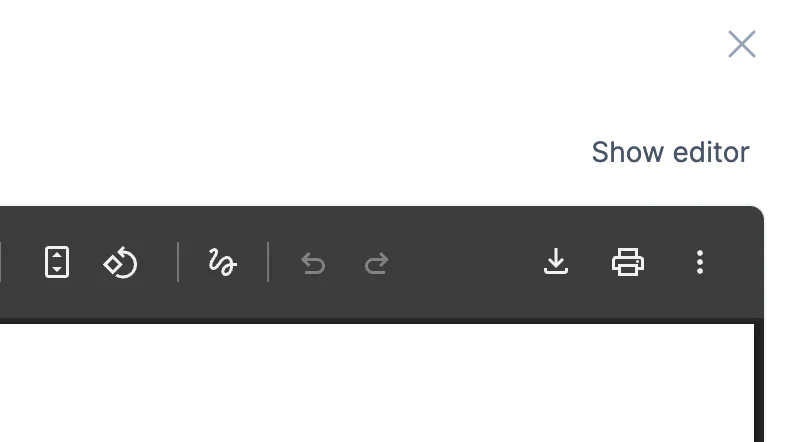
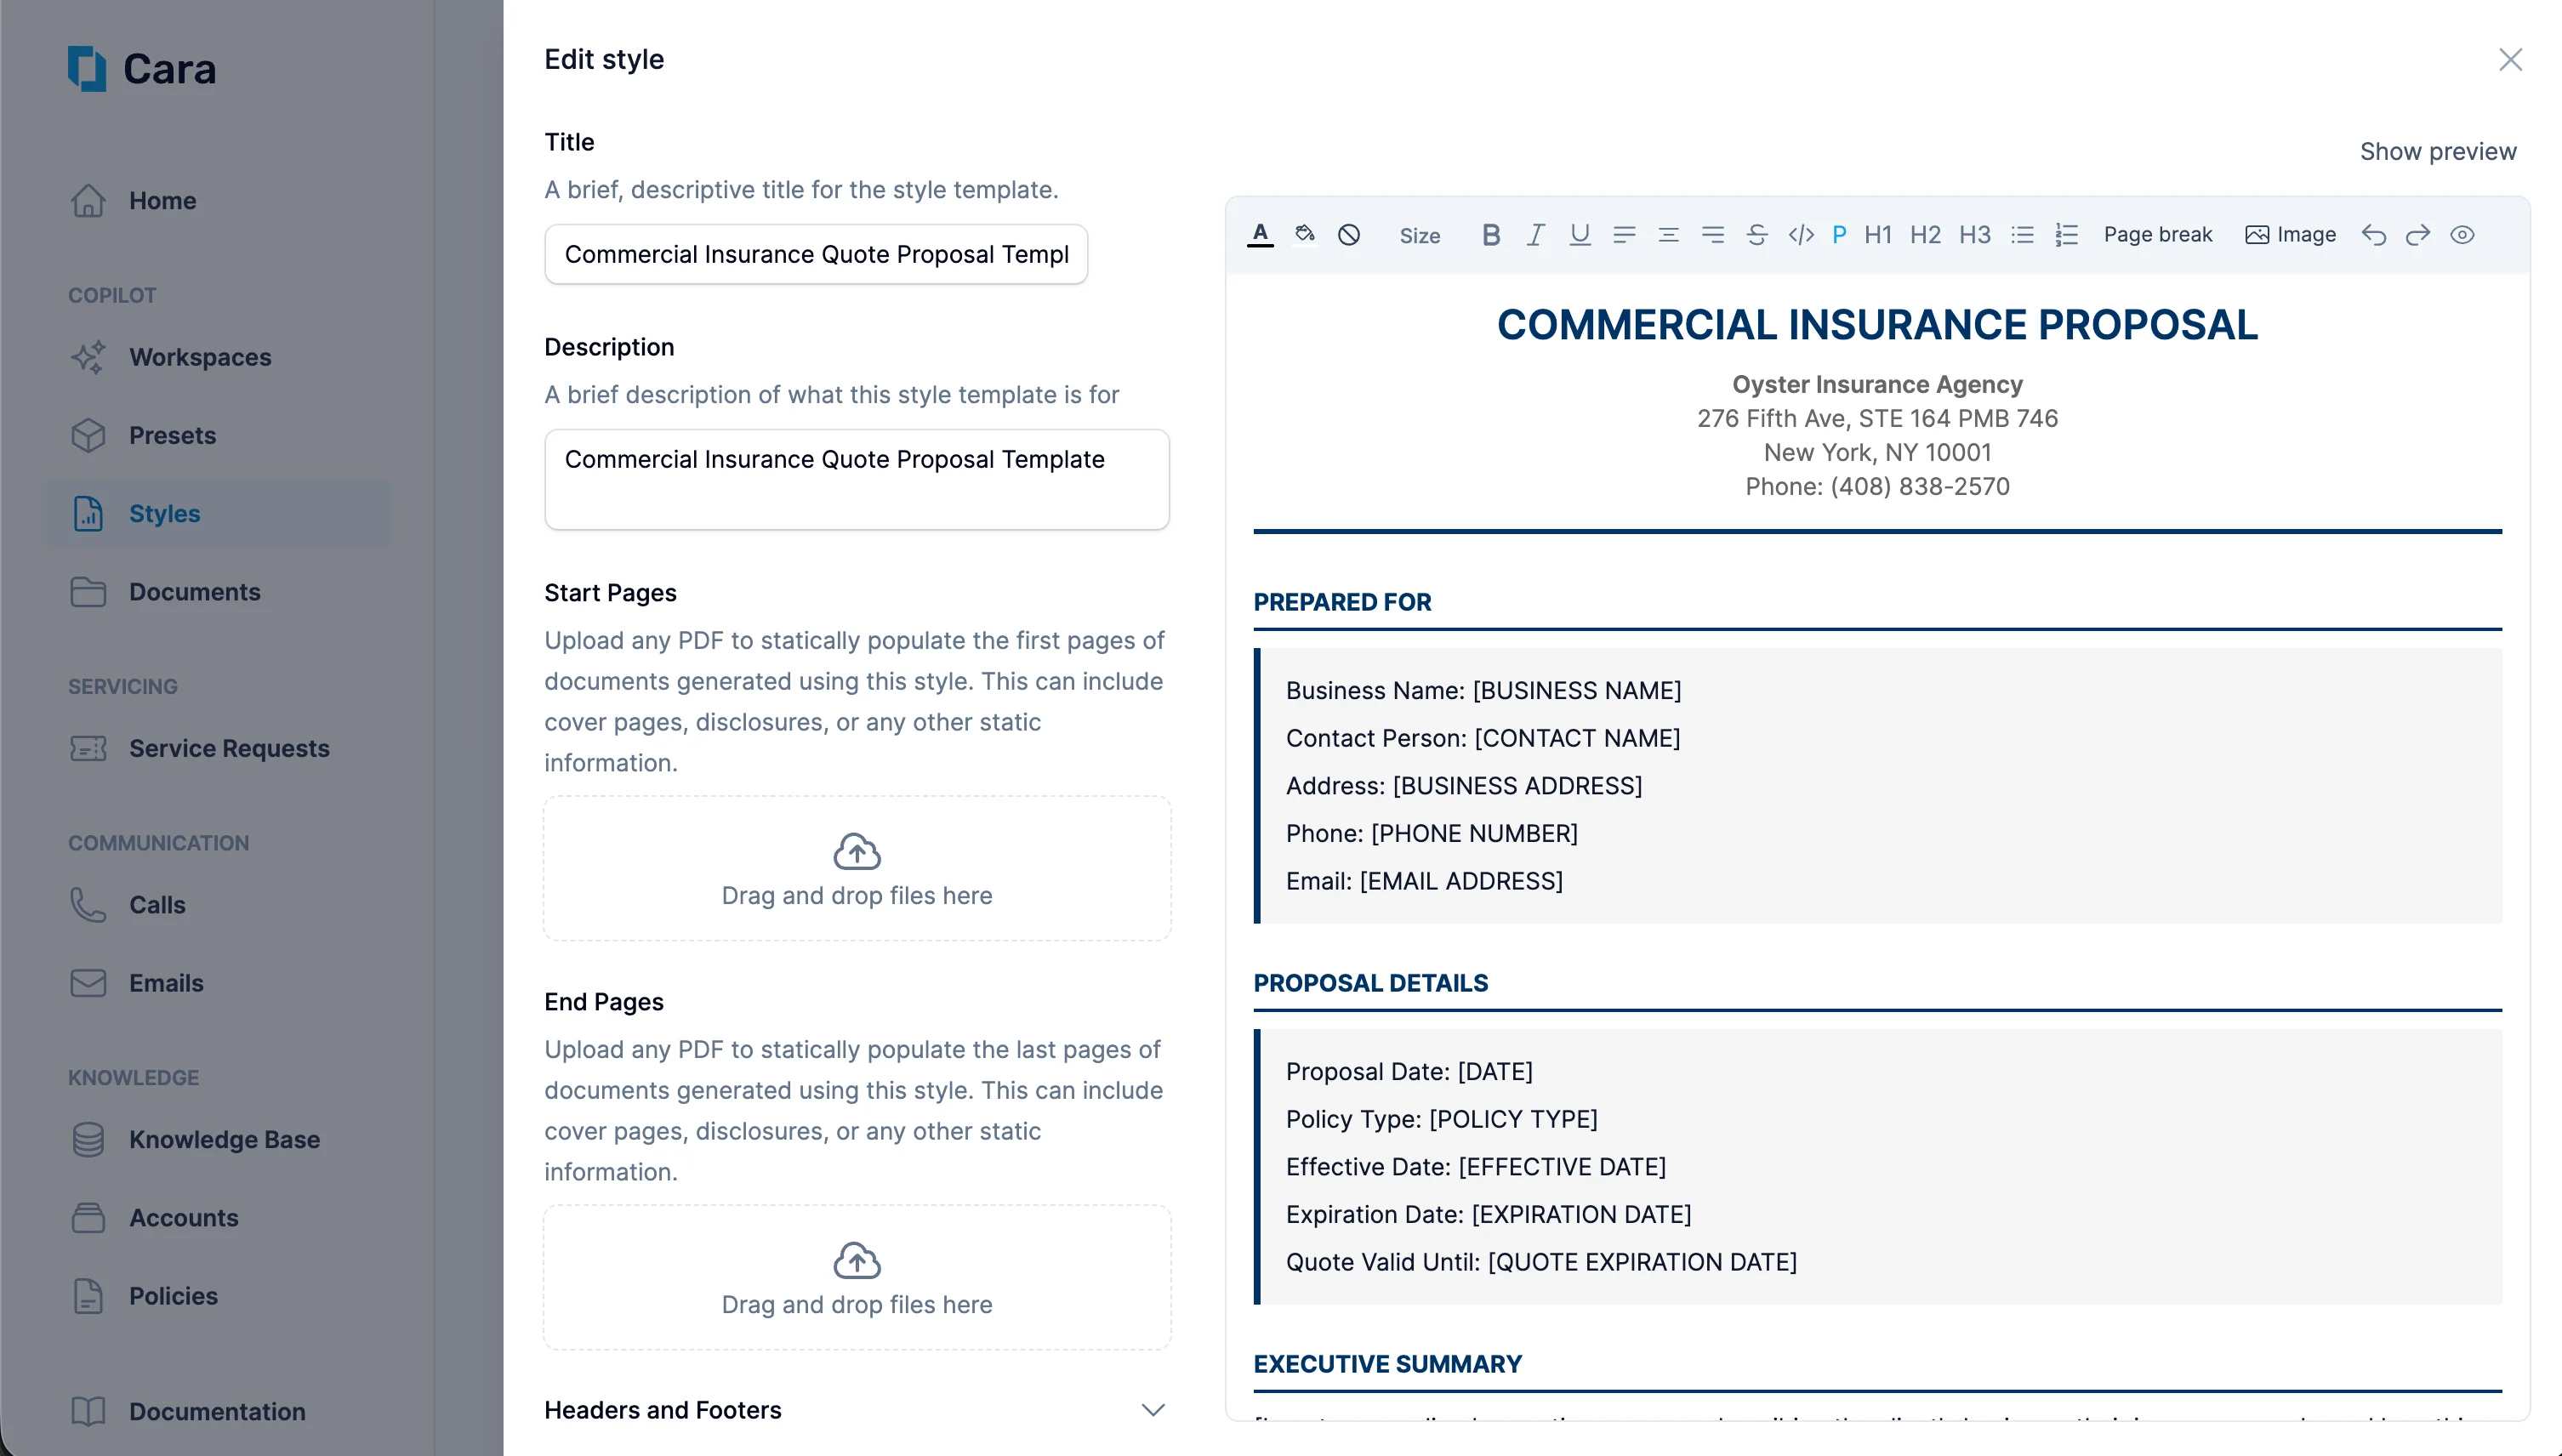
* Toggle between **Preview** and **Editor** using the button in the toolbar. Preview shows the full document with all styles applied, while Editor shows only the template content for editing.
Prompt Cara to create any document.
Once you're happy with the look and formatting, click **Save as Template** in the file editor and select **Convert to Template**
Cara will analyze the document and replace variable content (names, dates, limits, premiums, etc.) with placeholders in `[[DESCRIPTOR]]` format, while preserving all formatting, colors, tables, and layout.
Review the generated template, make any adjustments. Click "**Save as Template**" again, and select "**Save as Template**". Your saved templates will appear in the [**Styles**](/copilot/documentgeneration/styles) tab.
## Editing Templates
After a template is created, you can customize it in three ways:
### Before Saving
**AI Chat-Based Editing**
Ask Cara to make changes in plain language. For example:
* *"Add a row for Cyber Liability to the premium summary table"*
* *"Change the header color to match our brand blue"*
* *"Add a new placeholder for the account manager's phone number"*
Cara will update the template while preserving the existing structure and formatting.
**HTML Editor**
Click directly on any text in the file editor preview to edit it. This is useful for:
* Adjusting wording
* Table structures and layouts
* Adding page breaks
* Fonts and spacing
* Updating static text (e.g. company name, disclaimers)
* Renaming placeholders
* Adding new placeholders — type them using the `[[DESCRIPTOR]]` format (e.g. `[[COMPANY_NAME]]`, `[[DATE]]`)
### After Saving
Once saved, your template is available in the **Styles** tab where you can
* Toggle between **Preview** and **Editor** using the button in the toolbar. Preview shows the full document with all styles applied, while Editor shows only the template content for editing.
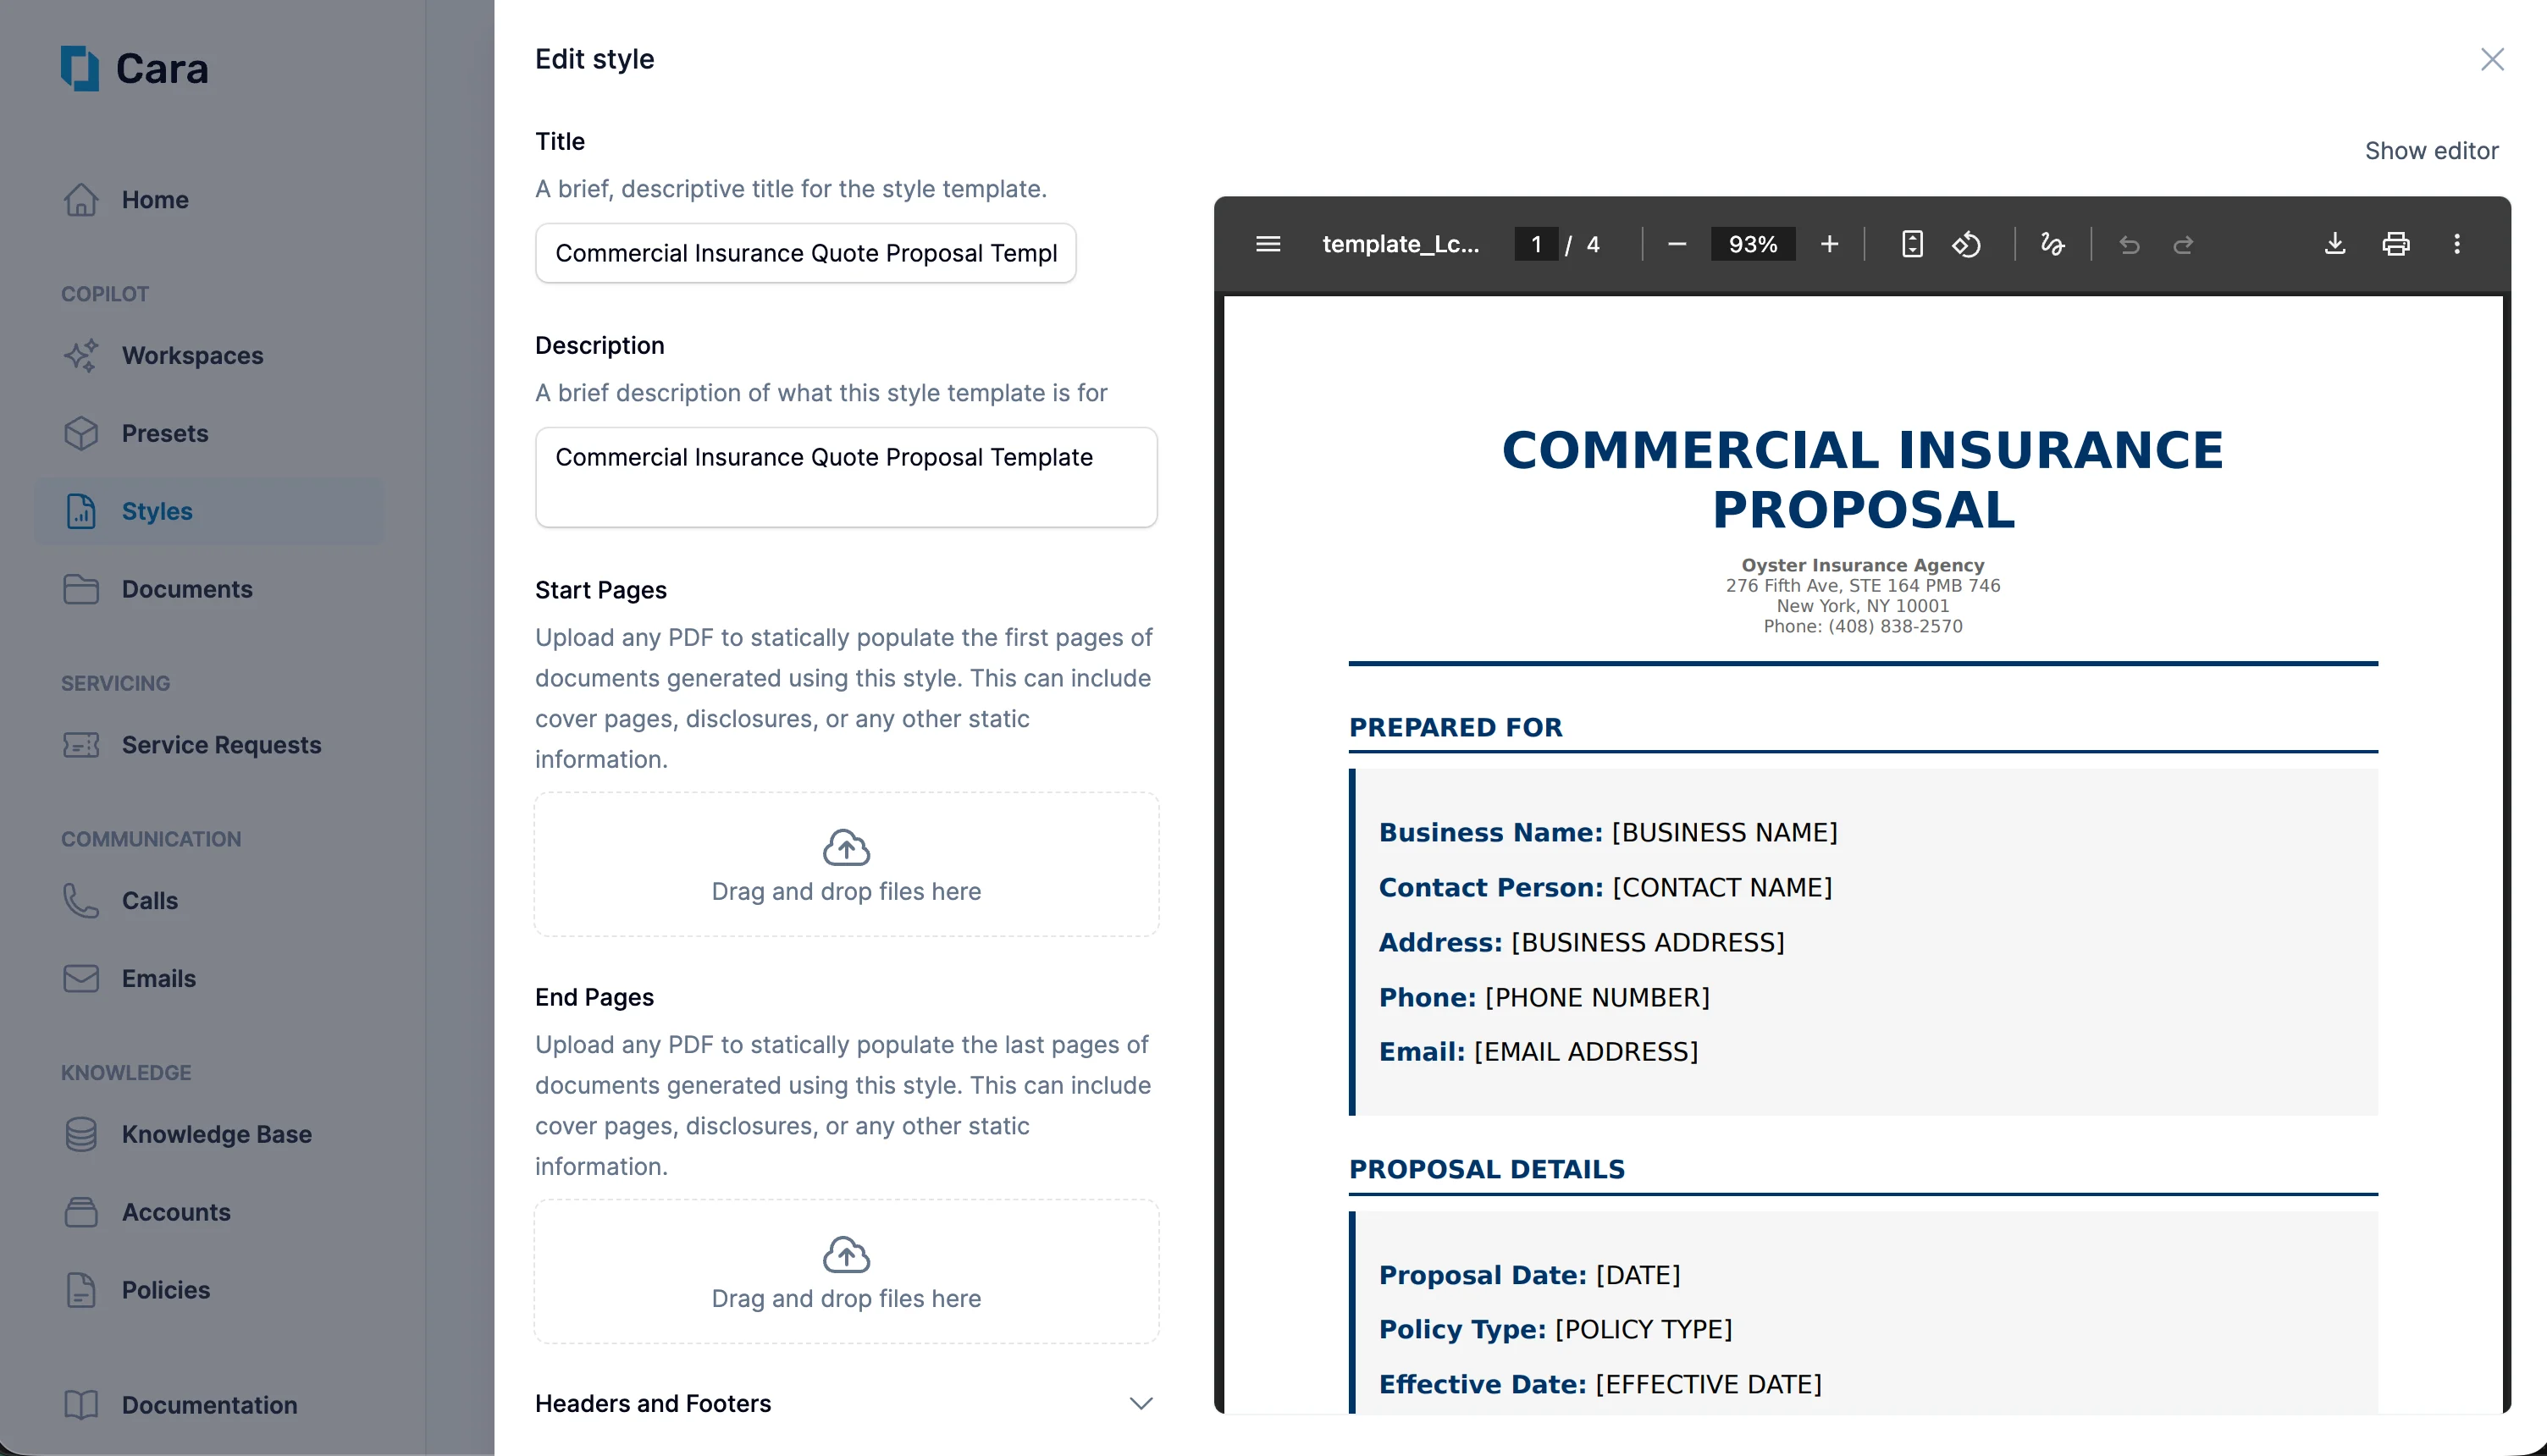
 * Add **Start Pages** and **End Pages** (e.g. branded cover pages, legal disclaimers)
* Configure **Headers and Footers**
* Add **Start Pages** and **End Pages** (e.g. branded cover pages, legal disclaimers)
* Configure **Headers and Footers**
 * Edit the template content (placeholders, layout, fonts, colors) in the style editor
 You can continue refining your template at any time from the Styles tab.
**Images**
You can add logos, icons, and other images to your documents and templates using the **Image** button in the file editor toolbar.
You can continue refining your template at any time from the Styles tab.
**Images**
You can add logos, icons, and other images to your documents and templates using the **Image** button in the file editor toolbar.
 This is useful for:
* Adding your agency or company logo
* Inserting icons next to service descriptions
Simply place your cursor where you want the image to appear, click the image insert button, and upload your file. You can adjust the image alignment (left, center, or right) using the toolbar controls. The image will be embedded directly into the template and will appear in every document generated from it.
**Placeholders**
Placeholders are the fillable fields in your template. They mark where variable content like client names, policy limits, or premium amounts should go. You can add, edit, or remove placeholders, just follow the double-bracket format:
```
[[PLACEHOLDER_NAME]]
```
Using a consistent naming pattern makes templates easier to fill and maintain over time.
## Word Template Builder New
The Word Template Builder is a dedicated editor for authoring reusable Word (`.docx`) templates from scratch or from an uploaded reference document. It complements the AI-conversion flow above — use the builder when you have a specific document structure in mind that you want to enforce every time.
Open the builder from **Copilot → Templates → New Word Template**.
### Choose a layout
The first decision is layout, and it determines how the rest of the template behaves:
A single-body document. Best for short, unstructured documents — a cover letter, a one-page notice, a compact certificate. Placeholders live directly in the body.
A document composed of ordered sections. Best for structured deliverables — quote proposals, risk reports, renewal packets — where different parts of the document have different rules and reuse potential.
### Section types (Sectioned layout)
In a Sectioned template, each section carries a type that controls how Cara treats it at generation time:
| Type | Behavior |
| -------------- | ------------------------------------------------------------------------------------------------------------------------------------------------------------------------- |
| **Static** | The section text is written into every generated document unchanged. Cara does not rewrite or vary this content. |
| **Repeatable** | The section is a template for a list — Cara emits one instance per item (e.g. one section per location, per policy). |
| **Required** | Cara must produce content for this section. If the source materials don't contain enough information, Cara flags the section as missing rather than silently omitting it. |
You can mix types within a template. A typical quote proposal might use a Static cover section, a Required executive summary, and a Repeatable per-quote coverage block.
### Uploading a reference
Both layouts accept a reference `.docx` upload. The builder ingests the file as the starting point for the template body (Simple) or the current section (Sectioned) — you keep the original formatting and only need to swap variable content for `[[PLACEHOLDER]]` fields.
### Versioning
Word templates are versioned. Every save creates a new version; earlier versions are retained and can be restored from the version drawer. Existing workspaces referencing a template continue to use the version they were generated with unless you explicitly ask Cara to re-render.
## Applying Templates
To generate a new document from a saved template, simply reference the template name in your prompt anywhere in Cara (Presets, Custom Presets, or Ask Cara). Cara will recognize the template, and you can provide the information to fill in the placeholders by attaching input files.
This is useful for:
* Adding your agency or company logo
* Inserting icons next to service descriptions
Simply place your cursor where you want the image to appear, click the image insert button, and upload your file. You can adjust the image alignment (left, center, or right) using the toolbar controls. The image will be embedded directly into the template and will appear in every document generated from it.
**Placeholders**
Placeholders are the fillable fields in your template. They mark where variable content like client names, policy limits, or premium amounts should go. You can add, edit, or remove placeholders, just follow the double-bracket format:
```
[[PLACEHOLDER_NAME]]
```
Using a consistent naming pattern makes templates easier to fill and maintain over time.
## Word Template Builder New
The Word Template Builder is a dedicated editor for authoring reusable Word (`.docx`) templates from scratch or from an uploaded reference document. It complements the AI-conversion flow above — use the builder when you have a specific document structure in mind that you want to enforce every time.
Open the builder from **Copilot → Templates → New Word Template**.
### Choose a layout
The first decision is layout, and it determines how the rest of the template behaves:
A single-body document. Best for short, unstructured documents — a cover letter, a one-page notice, a compact certificate. Placeholders live directly in the body.
A document composed of ordered sections. Best for structured deliverables — quote proposals, risk reports, renewal packets — where different parts of the document have different rules and reuse potential.
### Section types (Sectioned layout)
In a Sectioned template, each section carries a type that controls how Cara treats it at generation time:
| Type | Behavior |
| -------------- | ------------------------------------------------------------------------------------------------------------------------------------------------------------------------- |
| **Static** | The section text is written into every generated document unchanged. Cara does not rewrite or vary this content. |
| **Repeatable** | The section is a template for a list — Cara emits one instance per item (e.g. one section per location, per policy). |
| **Required** | Cara must produce content for this section. If the source materials don't contain enough information, Cara flags the section as missing rather than silently omitting it. |
You can mix types within a template. A typical quote proposal might use a Static cover section, a Required executive summary, and a Repeatable per-quote coverage block.
### Uploading a reference
Both layouts accept a reference `.docx` upload. The builder ingests the file as the starting point for the template body (Simple) or the current section (Sectioned) — you keep the original formatting and only need to swap variable content for `[[PLACEHOLDER]]` fields.
### Versioning
Word templates are versioned. Every save creates a new version; earlier versions are retained and can be restored from the version drawer. Existing workspaces referencing a template continue to use the version they were generated with unless you explicitly ask Cara to re-render.
## Applying Templates
To generate a new document from a saved template, simply reference the template name in your prompt anywhere in Cara (Presets, Custom Presets, or Ask Cara). Cara will recognize the template, and you can provide the information to fill in the placeholders by attaching input files.